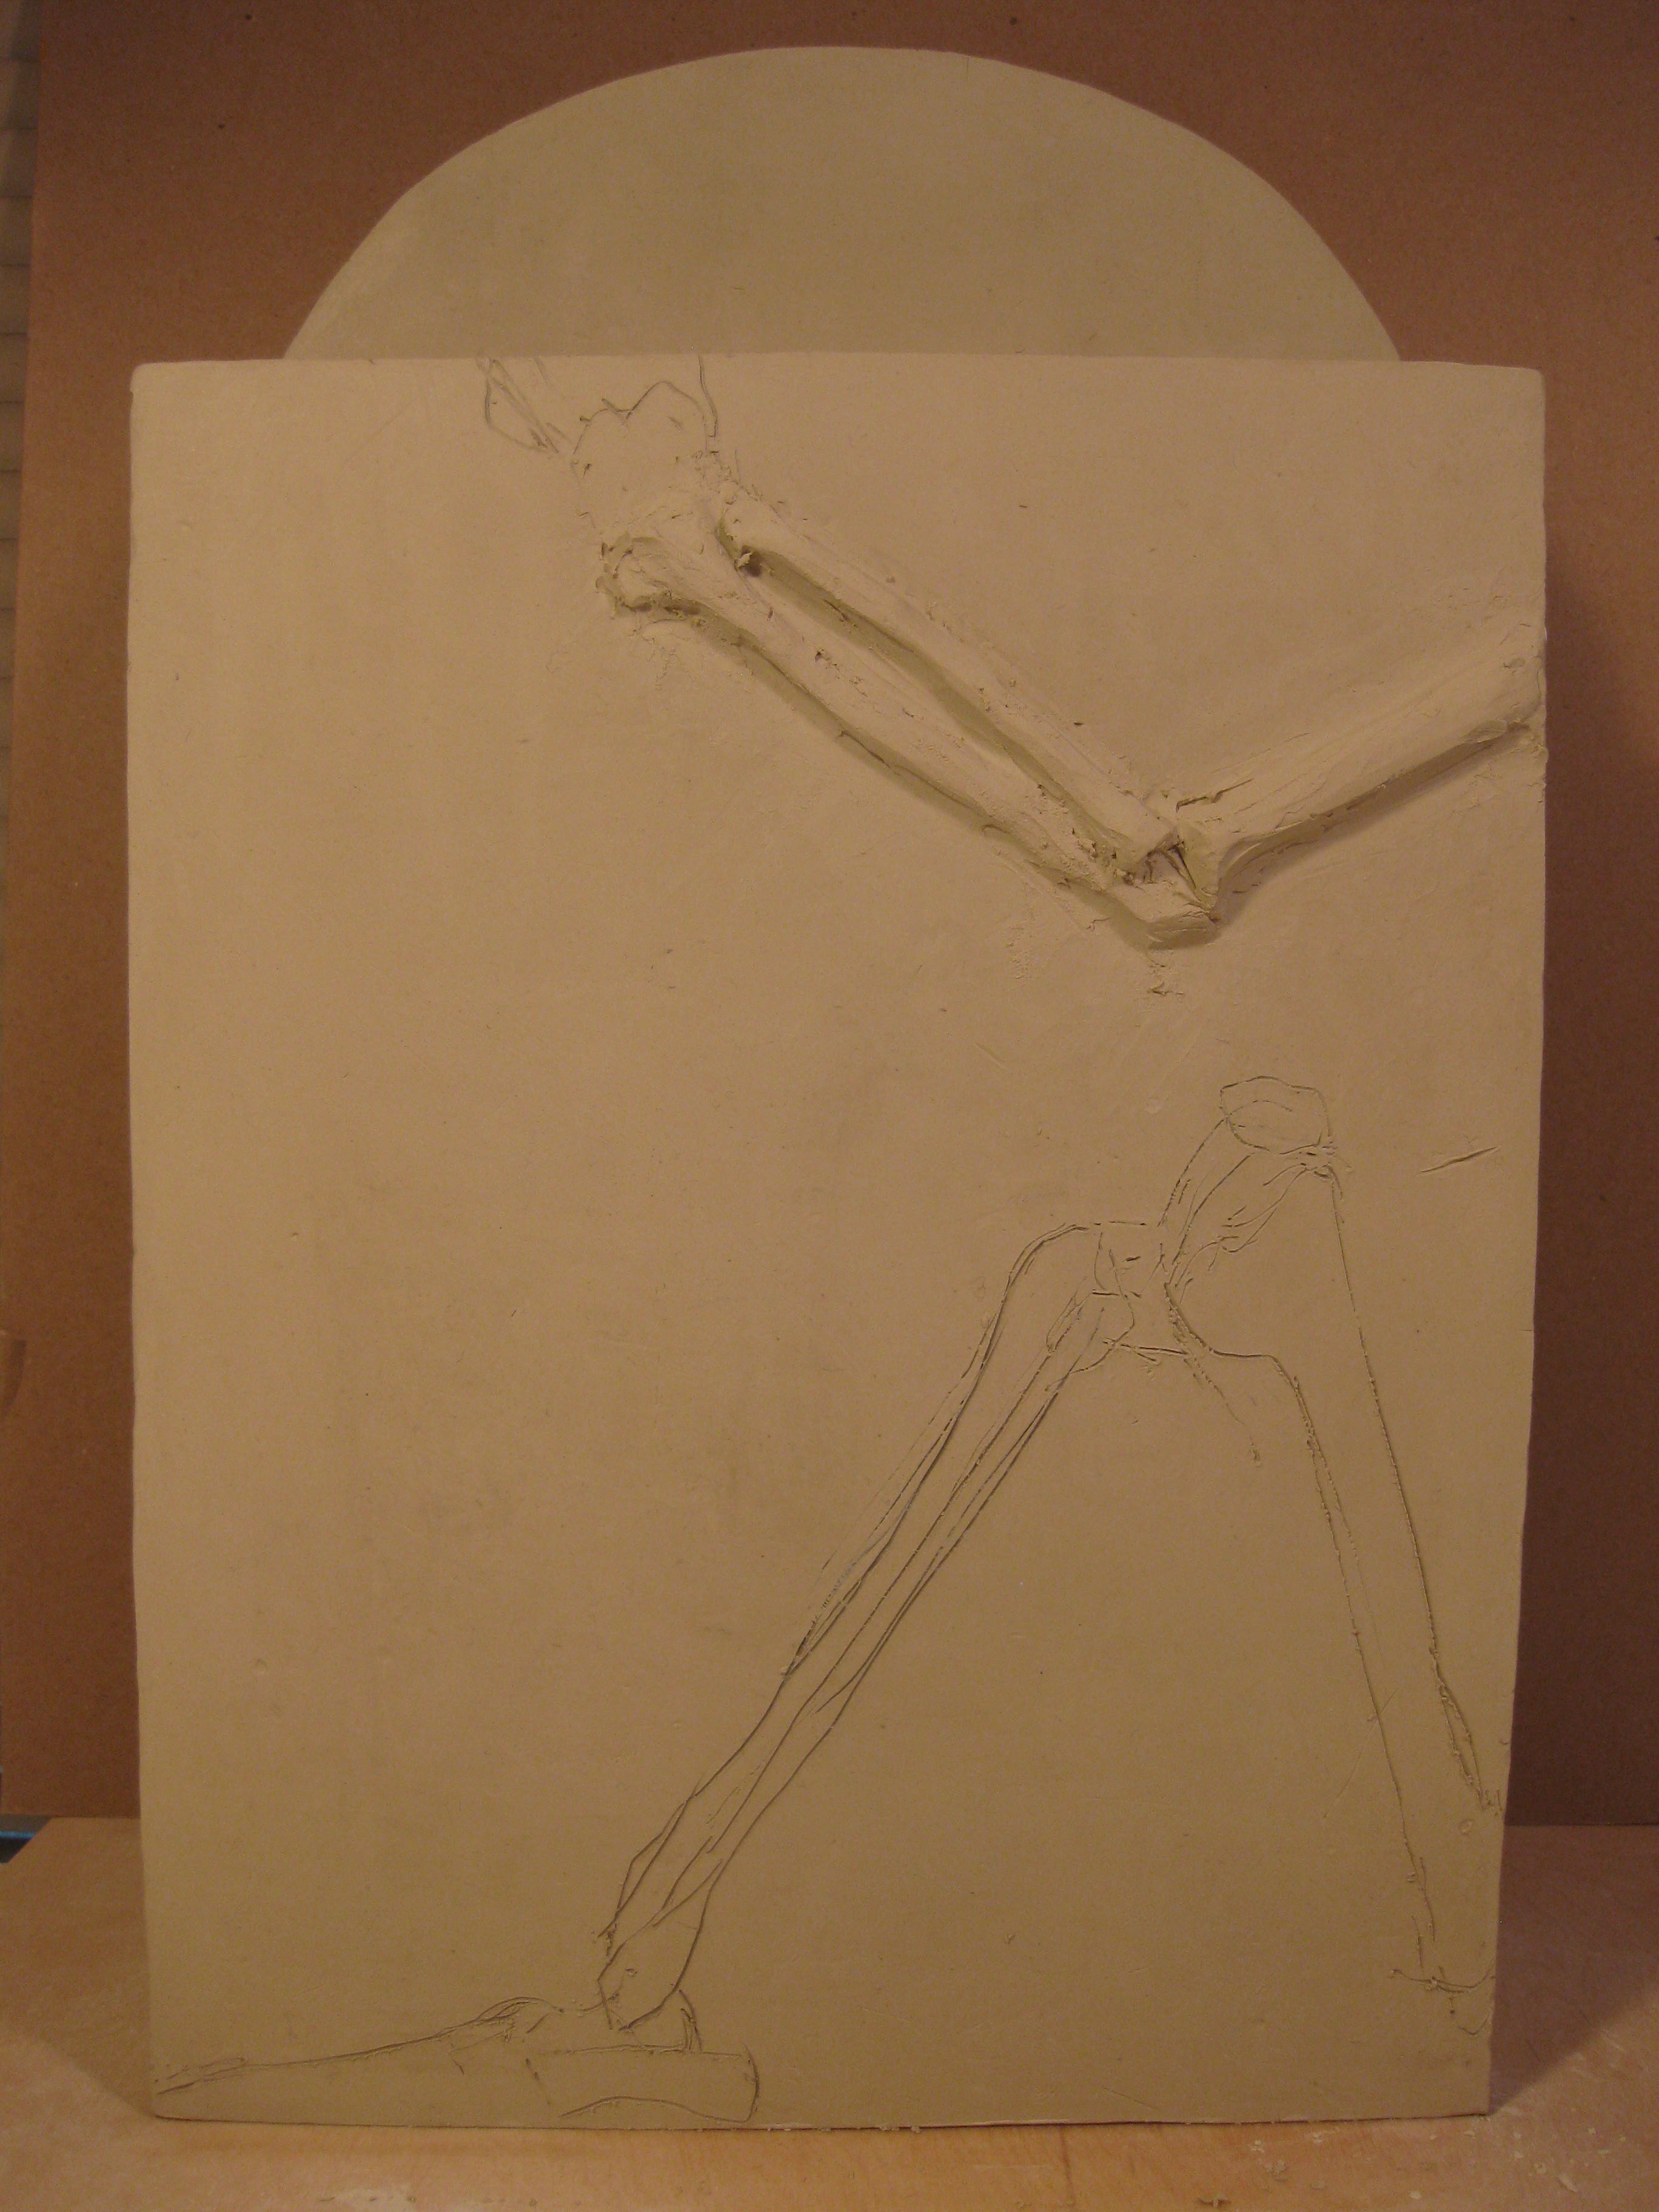
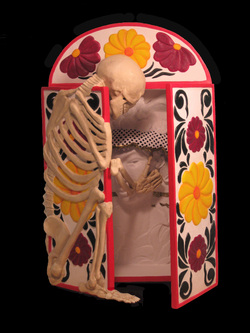
With the doors in good shape, I turned to the skeleton on the box. I wanted it to straddle the box with the left arm and leg on the back and the hand resting on the top of the box. It started with a drawing on the clay and then I started sculpting in low relief.
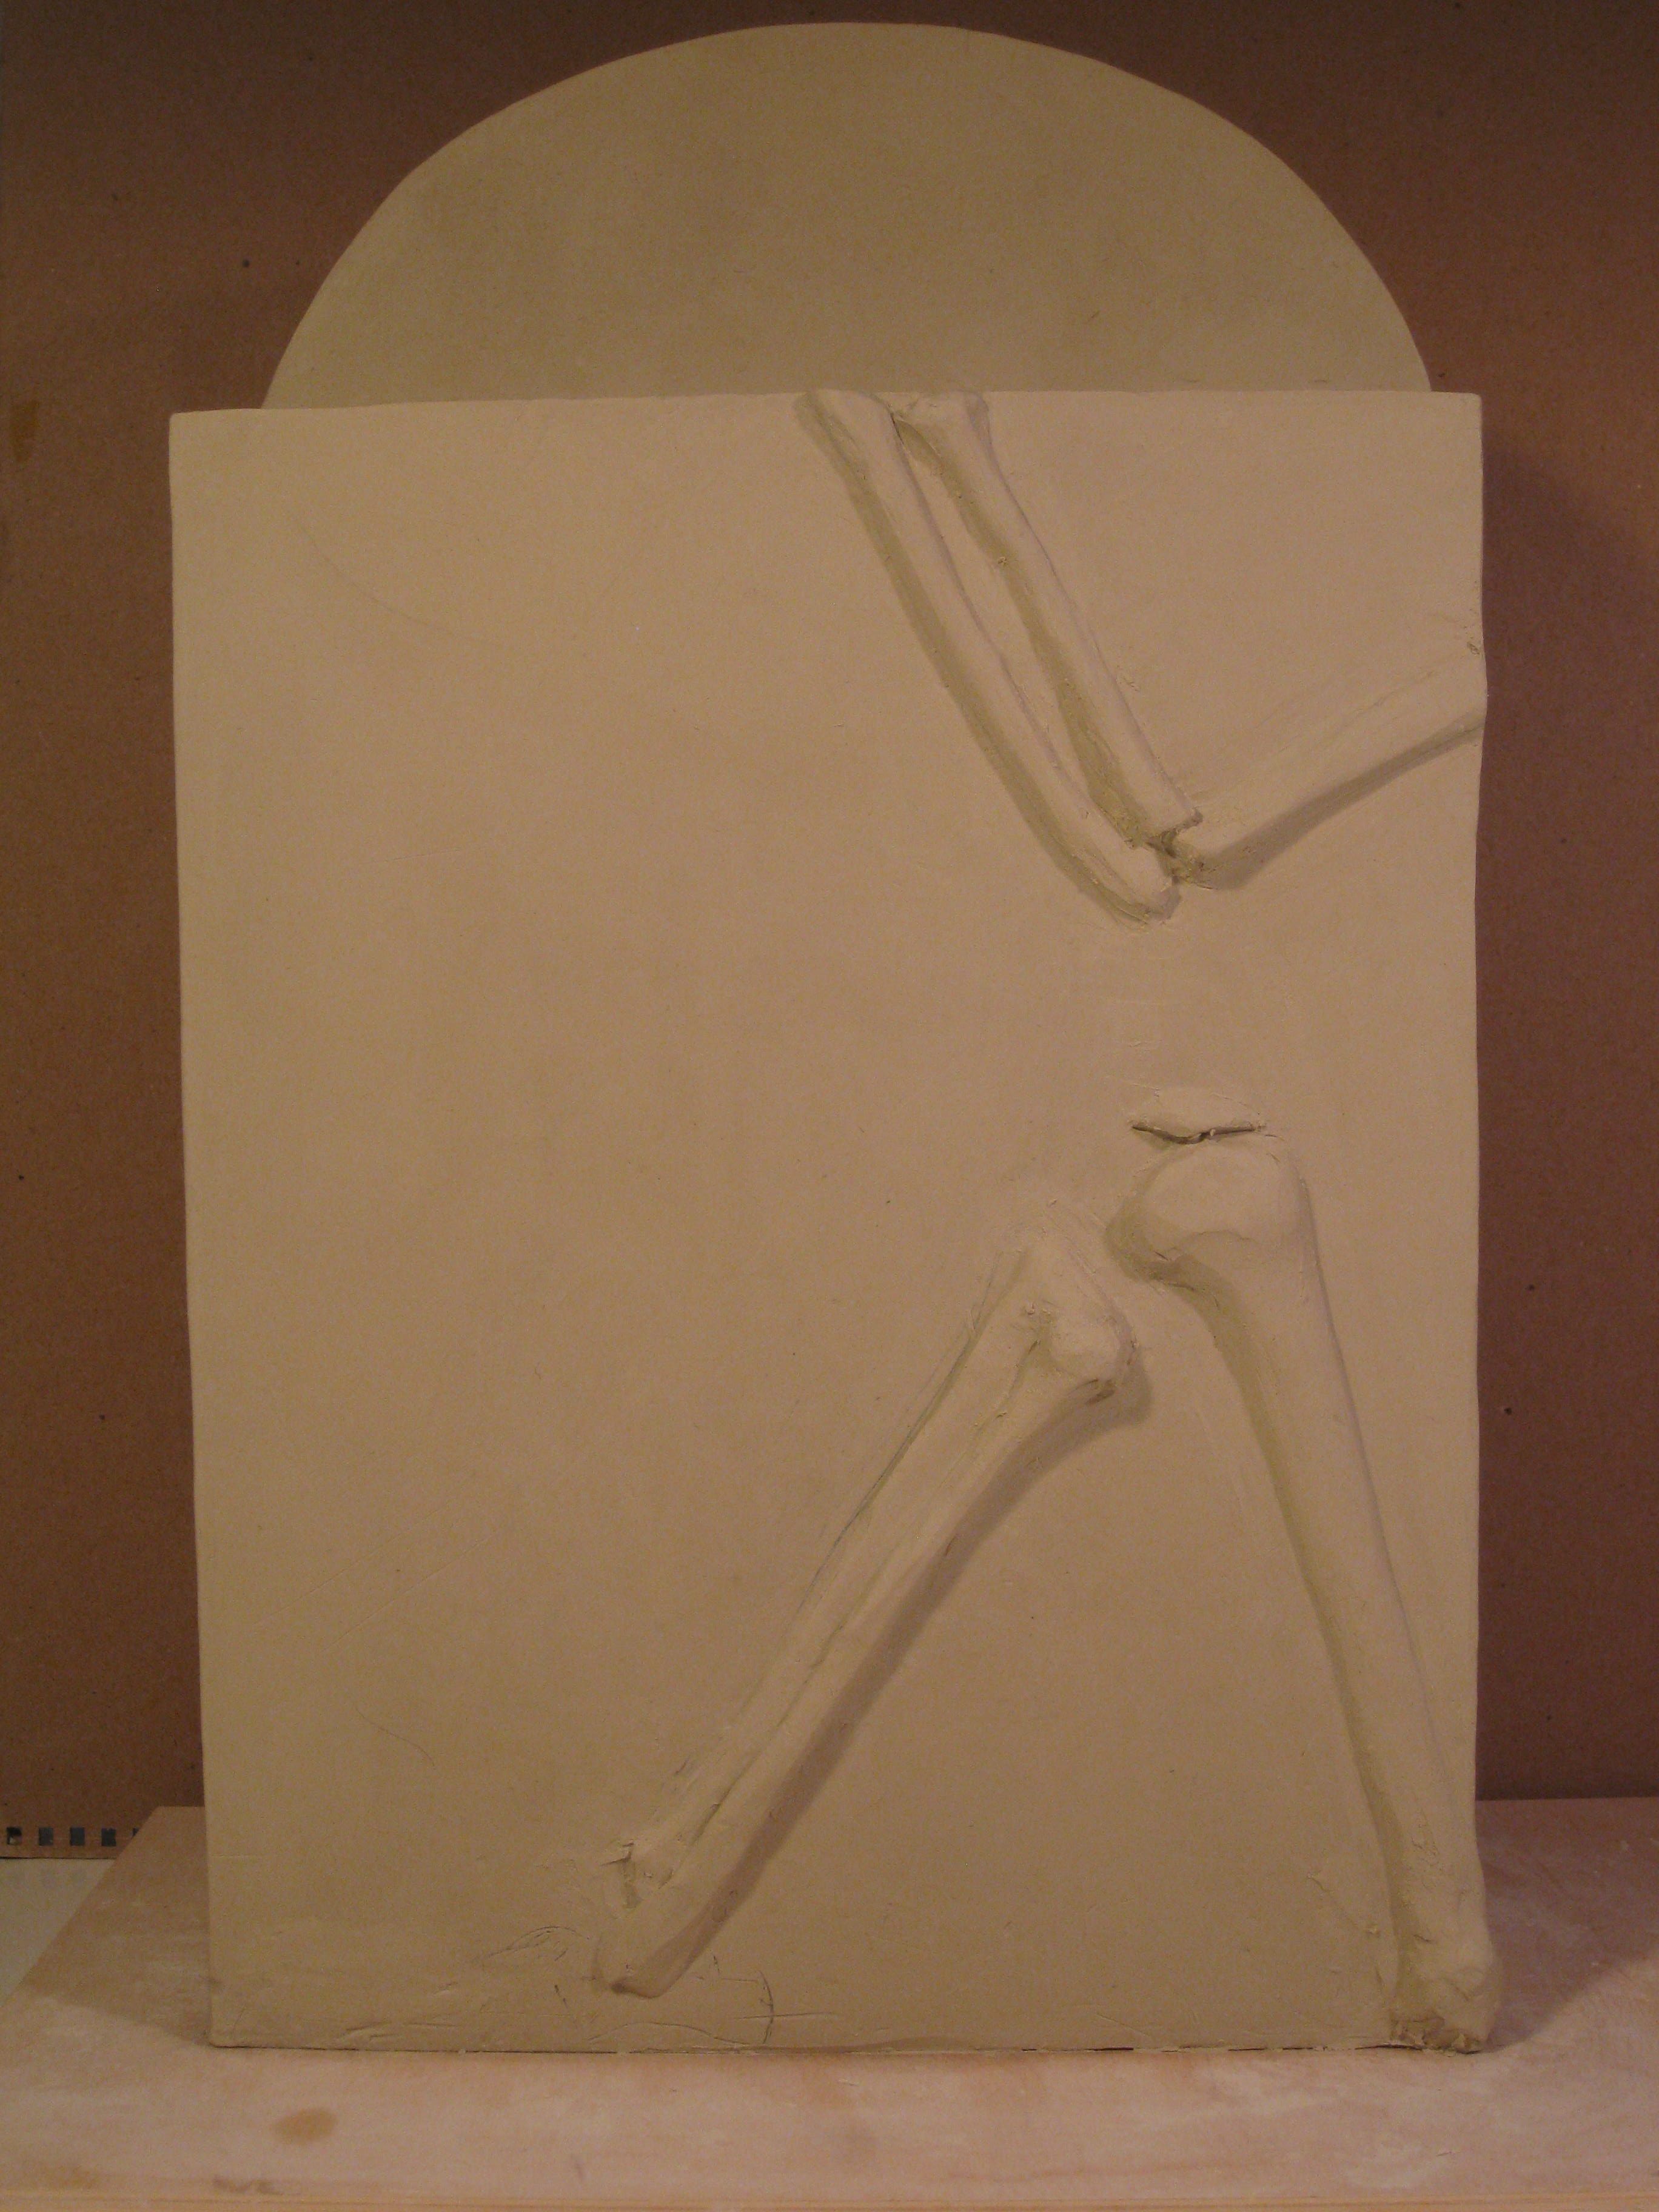
It didn't take long to finish the legs. But I soon realized that the the forearm was in the wrong place. I wouldn't be able to position the hand on the top of box where I wanted it, so I repositioned the forearm. Not too much work.
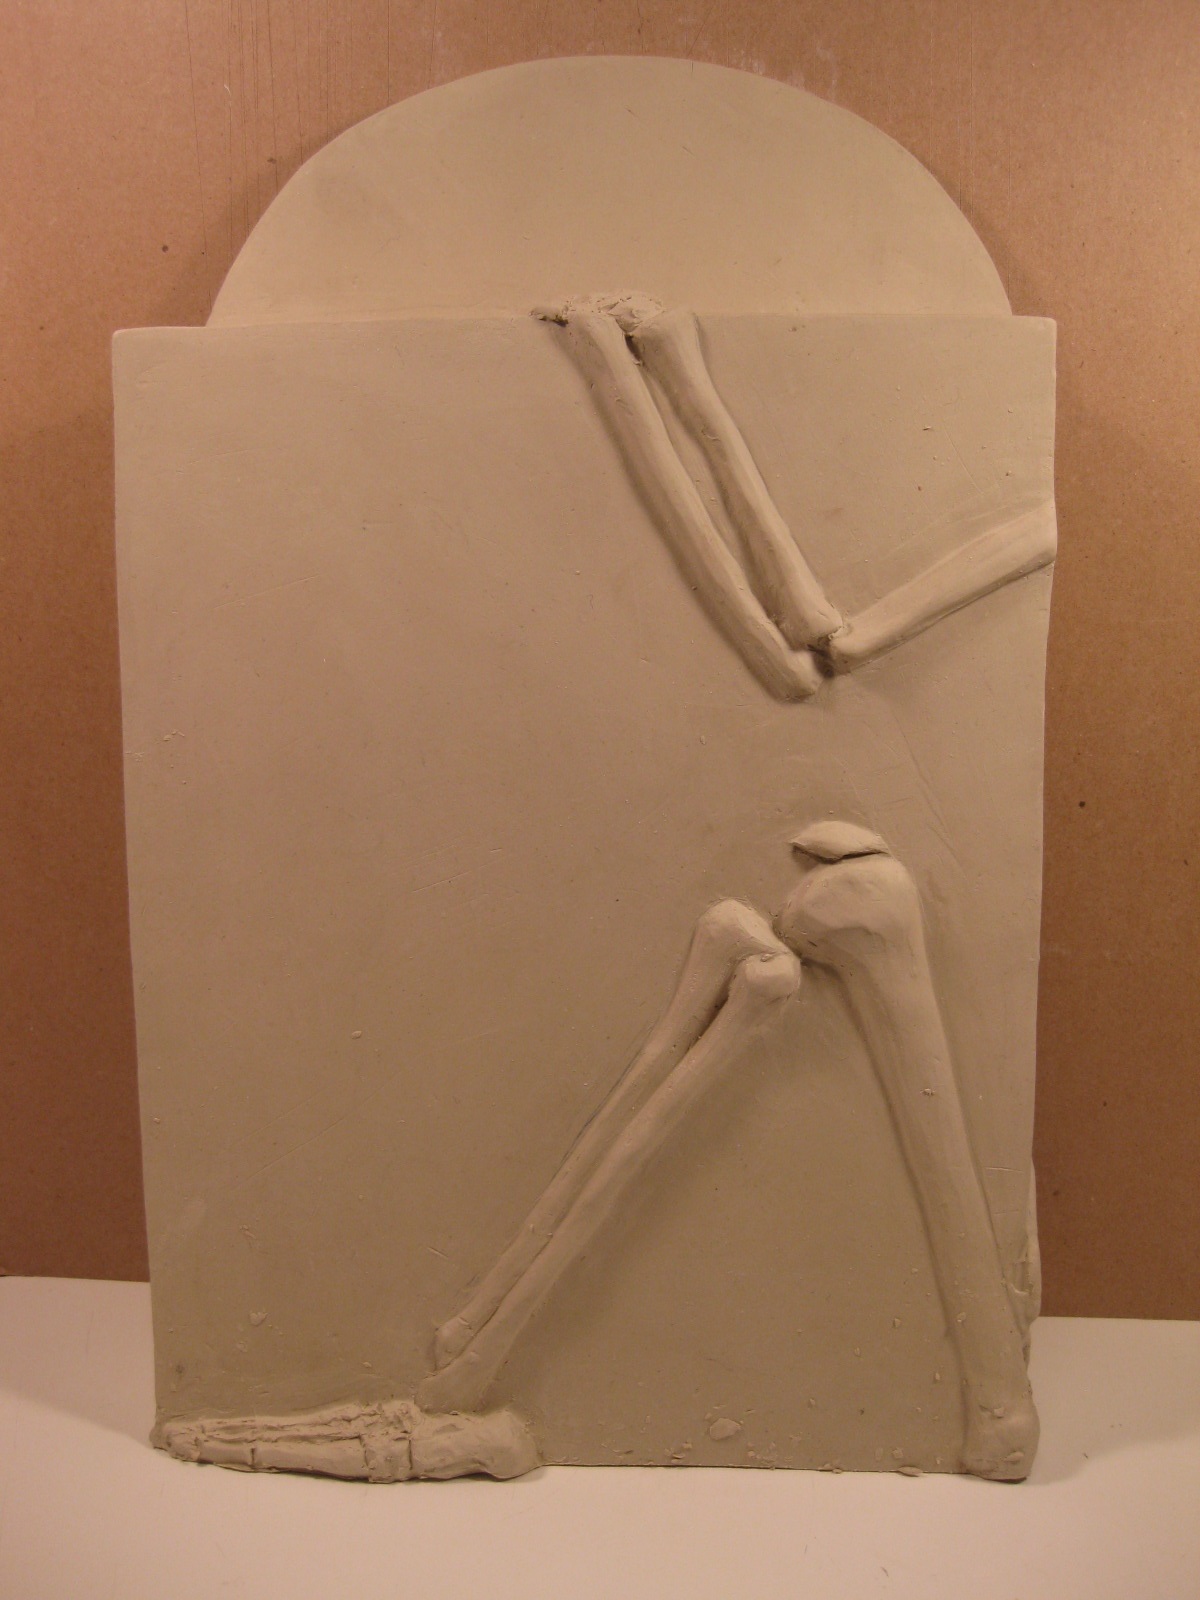
That done, it would seem that it was in pretty good shape. Not quite. If the elbow was on the back of the box, the upper arm would have to bend (or as bones do...break) to get around the corner of the box. Ah well. I'd missed that one too.
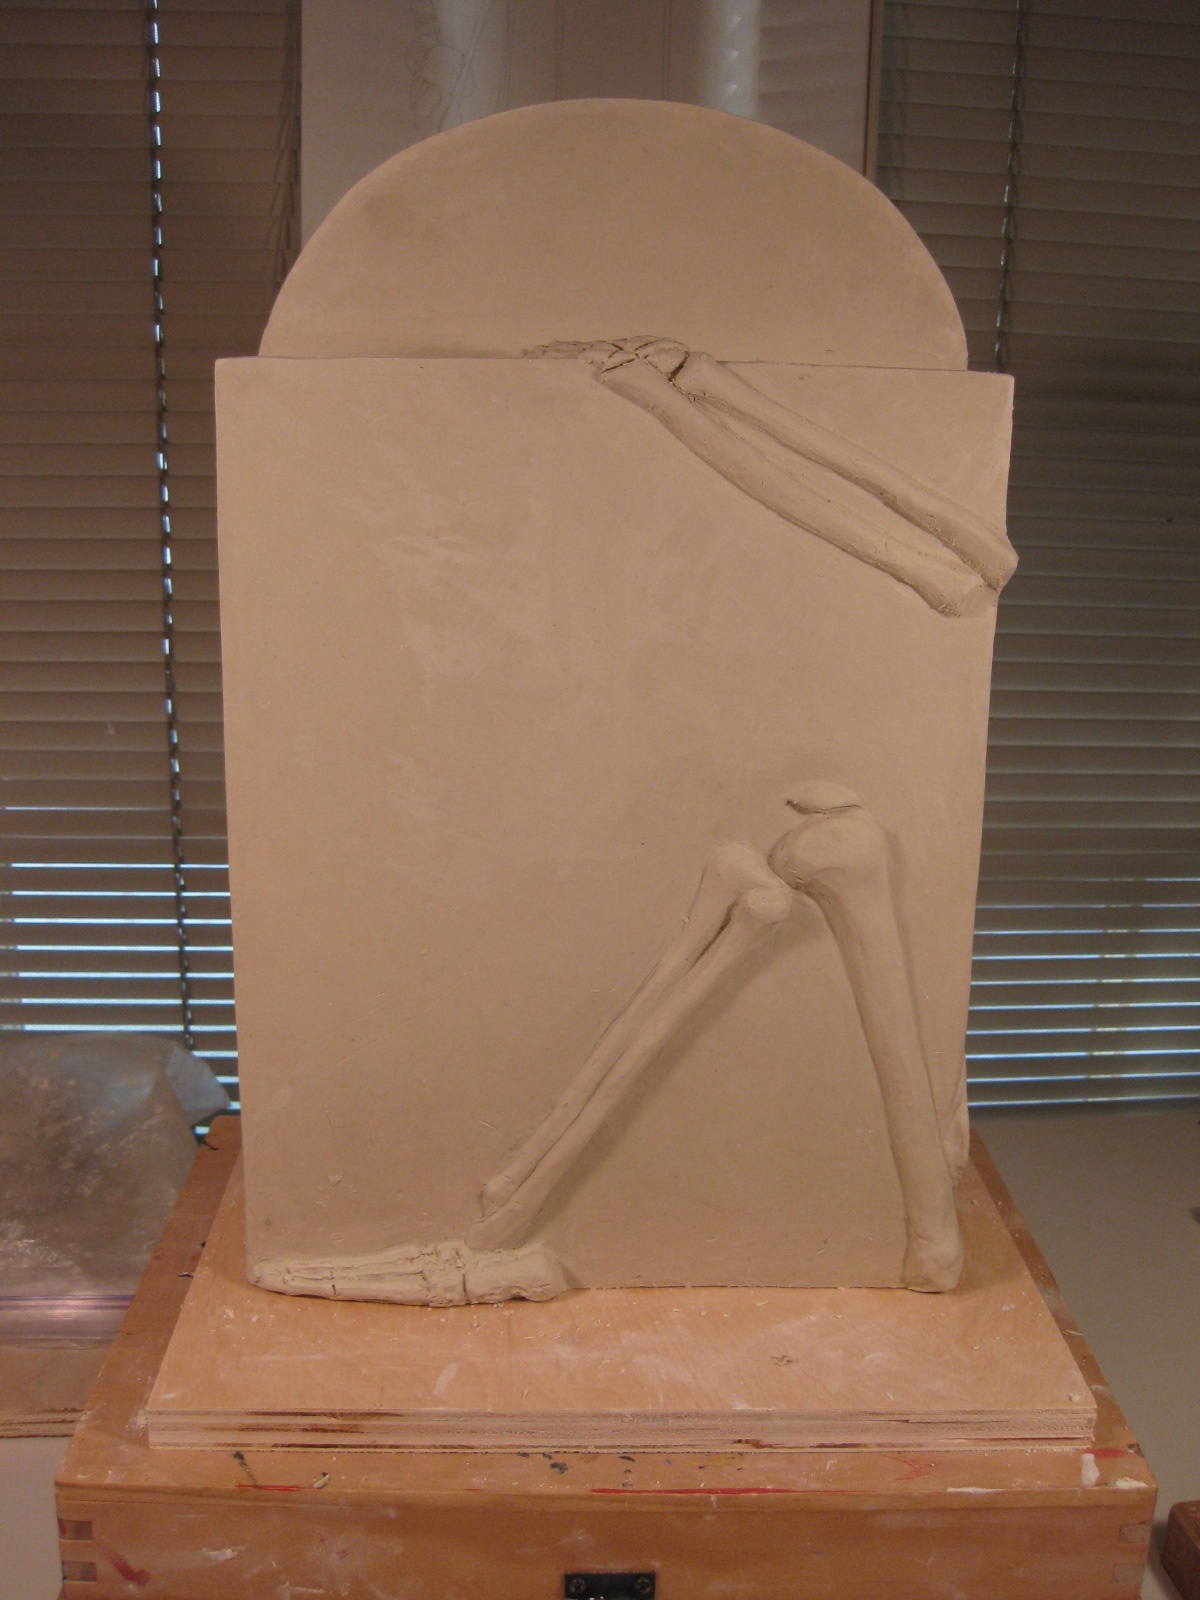
I skinned off the entire arm, sculpted the forearm in a good position for the hand and with the elbow at the corner of the box...better. You just can't cover all your bases. I added the foot and called it a day, relatively happy with the finished relief on the back of the box. I usually don't deal with this level of trial and error and I was a little afraid that it didn't bode well for the course that this piece might take. Some sculptures just fall into place easily, others are worked and reworked and make your life miserable....not a good sign for the finished product. I was still unsure how this piece would go. But at this point, it wasn't looking promising.
Typically, retablos have doors that can be opened and closed - usually attached to the box by small pieces of leather. I rolled out and cut two small slabs for the doors to this retablo. Each is 12 1/2" x 5" x 3/8" thick.
Traditionally, the doors are painted in bright colors with flower and leaf forms. For the outside surface of the doors I repeated the flowers on the top of the box but chose a different flower for the inside. I drew the images on the slabs and carved out the clay around the design, leaving a small edge around the door (this border will be red when the retablo is done). When they're painted and finished, the doors will be three dimensional versions of the traditional painted doors. Keeping the carving in very low relief will help them feel more like the classic retablo doors.
This process took about six days to get nice clean reliefs on both sides of the doors.
Click on the pictures if you want to see a larger version.
It started with the box, made in porcelain. "Porcelain" is just what we call a particular type of clay. It's white and smooth and sometimes a little bit difficult to work with but the end product is beautiful. It's what "the good dishes" that most of us grew up with are made of.
I rolled out a large slab of clay, about 3/8" thick and let it dry for a day. From that I cut the pieces for the box and the curved top piece.
The box is 13 1/2" tall, 10" wide and 3 1/2" deep.
The piece for the top of the retablo is about 3 1/2" tall. When it had dried a little, I drew the flowers and carved around them to create a low relief which I attached to the top of the box.
Clay is an amazing material. it has phenomenal elasticity but with the introduction of heat it will become permanent, lasting thousands of years. Scientists have tried to reproduce clay...recreating it on the molecular level. They can make a similar elastic material but have never been able to reproduce the permanence. I like the fact that the only way to get clay is to dig it out of the ground; a gift of the earth. It's also a material that allows you to make mistakes and fix them with very little difficulty.
The sculpture started with a doodle based on the tradition of the Peruvian retablo. Retablos are decorative boxes with doors that open and close. They are painted with flowers and leaf forms and house scenes of daily life or religious events. The Mexican retablo is likely to depict the skeletons from Day of the Dead.
I knew I wanted to talk about death and I chose to speak in the format of the retablo. There is en element of joy about them that can't be denied. I wanted the skeleton (death) outside the box, watching or reaching in. But I had no idea what he was watching or reaching for. I knew that if I started to build, eventually that part would come to me.
Thank you for visiting F.E. Young Sculpture. I'm very excited to have it up and running and look forward to your comments and questions (if you have any). www.feyoungsculpture.com. Email to f.e.youngsculpture@gmail.com.
As I built this sculpture (one of the Latin American pieces) I photographed it day by day to post on the blog and talk about the process of producing such a work. I wanted to blog about it in real time but was concerned about the problems that might arise...and they certainly did. So we'll be back tracking to the beginning in my next post. I hope you find it interesting.
My name is F.E. Young. The initials are in no way an attempt to desguise the fact that I am female. In fact, I'm happy and proud to be female...it suits me. My problem is with my name. In 1951 my mother named me Frances. This was timed perfectly for my eighth year to coincide with appearence of 'Frances the Talking Mule' movies on television. I became "Francie" just in time for the Gidget movies. For those of you who remember - Gidget's name was Francie. I suddenly found myself called "Fidget." But as an artist I signed F.E. Young. the initials spelled Fey, my grandmother's name and it stuck.